Frame-A-Face for macOS
Online Help Pages
- Frame-A-Face Interface
- Original Image Preview
- Menu Frame-A-Face
- Menu File
- Menu Presets
- Menu View
- Menu Help
- Crop Setup Panel
- Edit Presets Menu
- Presets In Details
- Workflow Automation
- Settings
- Register Program
- Customised Workflow
Frame-A-Face Interface
This is the main window of the Frame-A-Face program.

The window is divided into three panels: a file list on the left, the original image preview with a crop box in the middle, and the crop preview on the right.
After you open a folder with files, the program scans the images, detects faces, and displays a list of file items on the left.
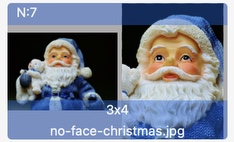
Here’s what you can see in a list item:

The semi-transparent top and bottom bars can have different colors, indicating various statuses:
If everything goes well and the program finds only one face in the photo, you’ll see green items like this:

If the scan procedure was not completed, or you canceled it, the bars will be gray:

If the program did not find a face in the photo, you will see yellow bars:

If more than one face was found, the bars will be red:

If the photo has been manually edited (for example, if you’ve moved or resized the crop box, rotated the image, or selected a face that wasn’t found), you’ll see a Custom Crop with blue bars:


To omit an image from the export, make it black. Right-click on the list item and select Toggle export from the menu. (Use the same menu to revert this action.)

When all images are processed, you can export the cropped pictures. Select File - Export All… from the menu, or use the speed button in the bottom left corner.

There are three export options, which you can select in the Preferences panel:

Export all detected faces - This is the default option. Image names for additional crops are appended with suffixes like -x2, -x3, and so on.
Export one face per photo. Omit photos with zero or multiple faces - When this option is selected, the program only exports “good” photos with one person in the photo.
Export one face per photo. Alert when more than one face is detected - When this option is selected, the program displays an alert message There are un-reviewed images in the job, opens the next problematic image, and waits for you to correct it. You must select one face that you want to export.

If more than one face is detected in the photo, you must select the face you want to export from the top bar. This selection makes the image a Custom Crop, allowing you to continue with the export.

If no face is detected in the photo, the program will open the image and draw an expanded crop box in the middle of the image.

You should adjust the crop box to create a Custom Crop. Alternatively, you can right-click on the image and select Toggle export from the menu to omit the photo from the export.
