Frame-A-Face is streamlined and extremely easy-to-use.
If you shoot any high-volume jobs, such as schools and sports teams, using
Frame-A-Face in your workflow will save you time and money. Frame-A-Face’s
facial recognition technology locates the face in an image and then automates the
creation of multiple crops for each image.
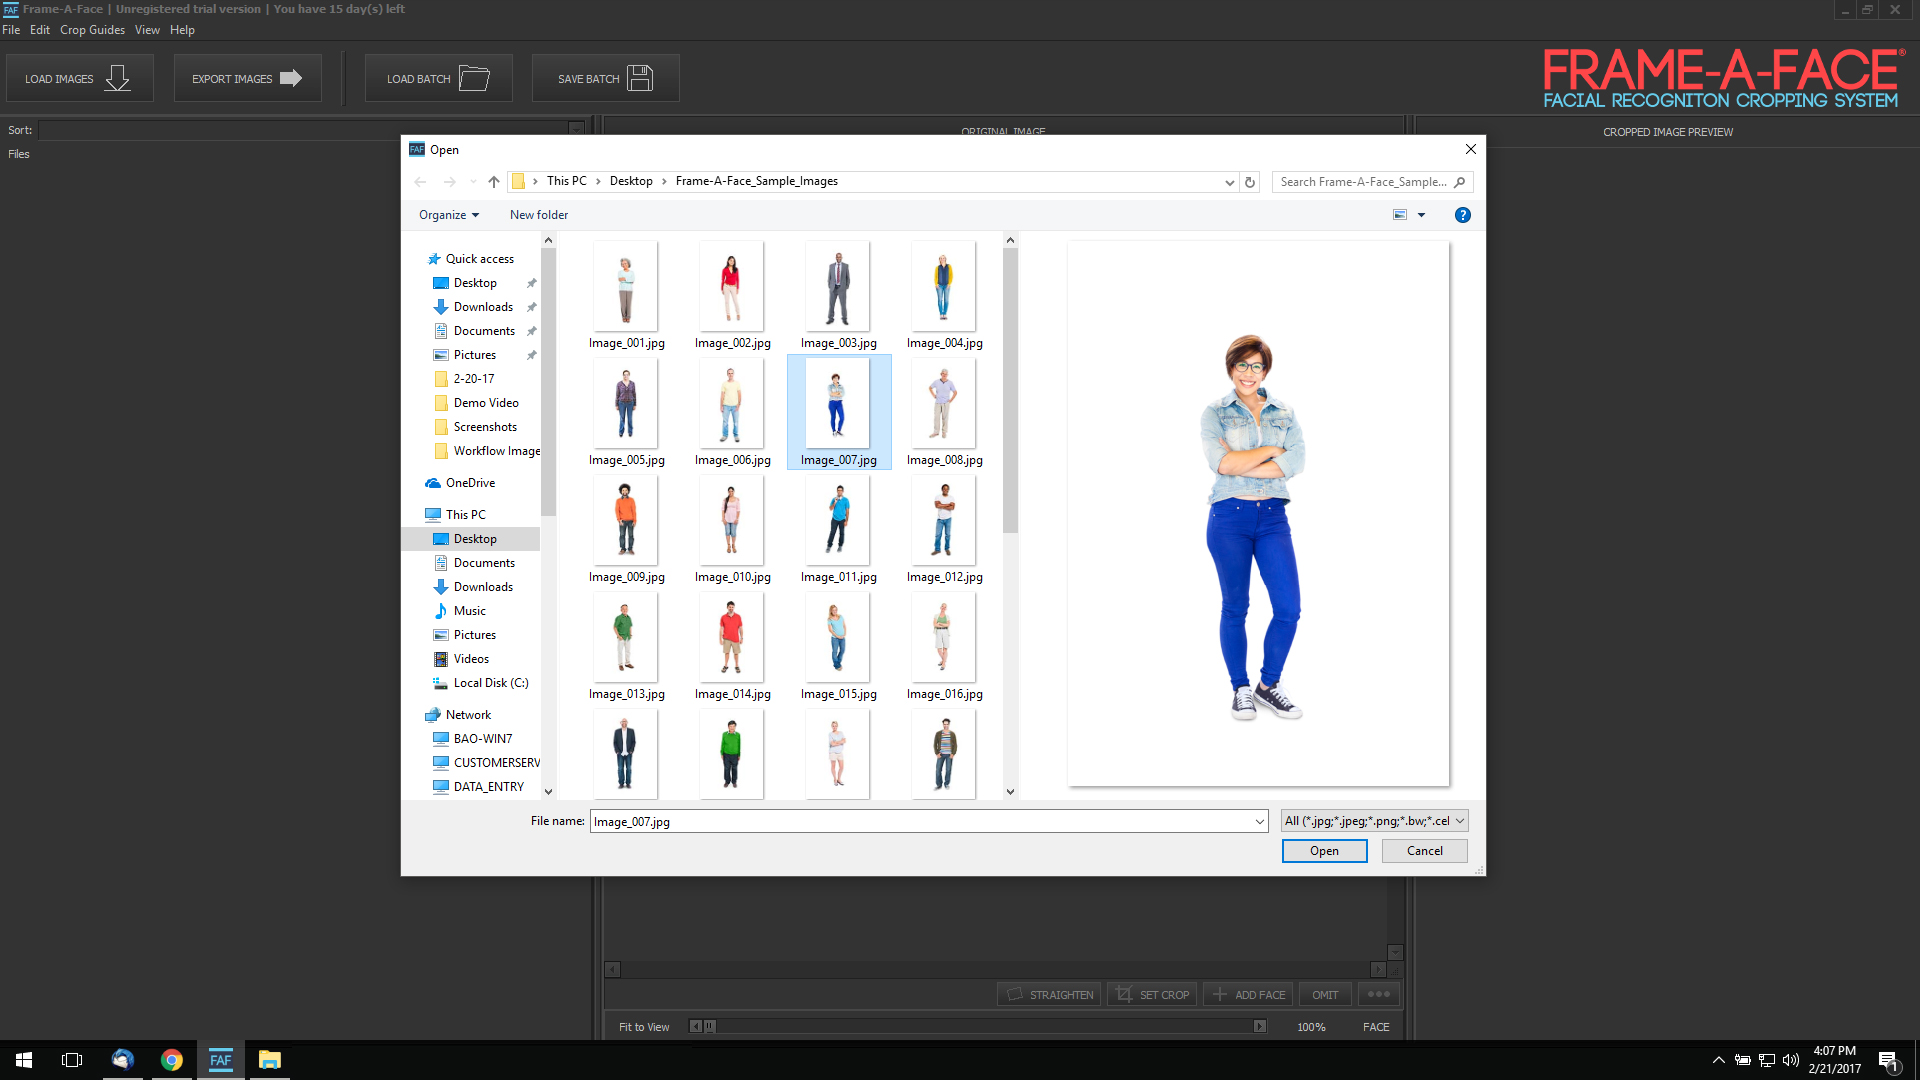
1. After Frame-A-Face launches, click on the “Load Images” button. Browse to the folder with your batch of images and be sure to select all, using control + a.
2. Once images are loaded and faces detected, use the “Sort” drop-down (located above the image tiles) and choose “No faces or multiple faces detected.”
3. In the image tiles, turn off any box that does not contain a face by clicking on it.
4. Use the add face button to draw a face box (tightly) around any image where a face was not found.
5. Now switch back to “All Images” in the Sort drop-down. This will display all images and detected faces in the batch.
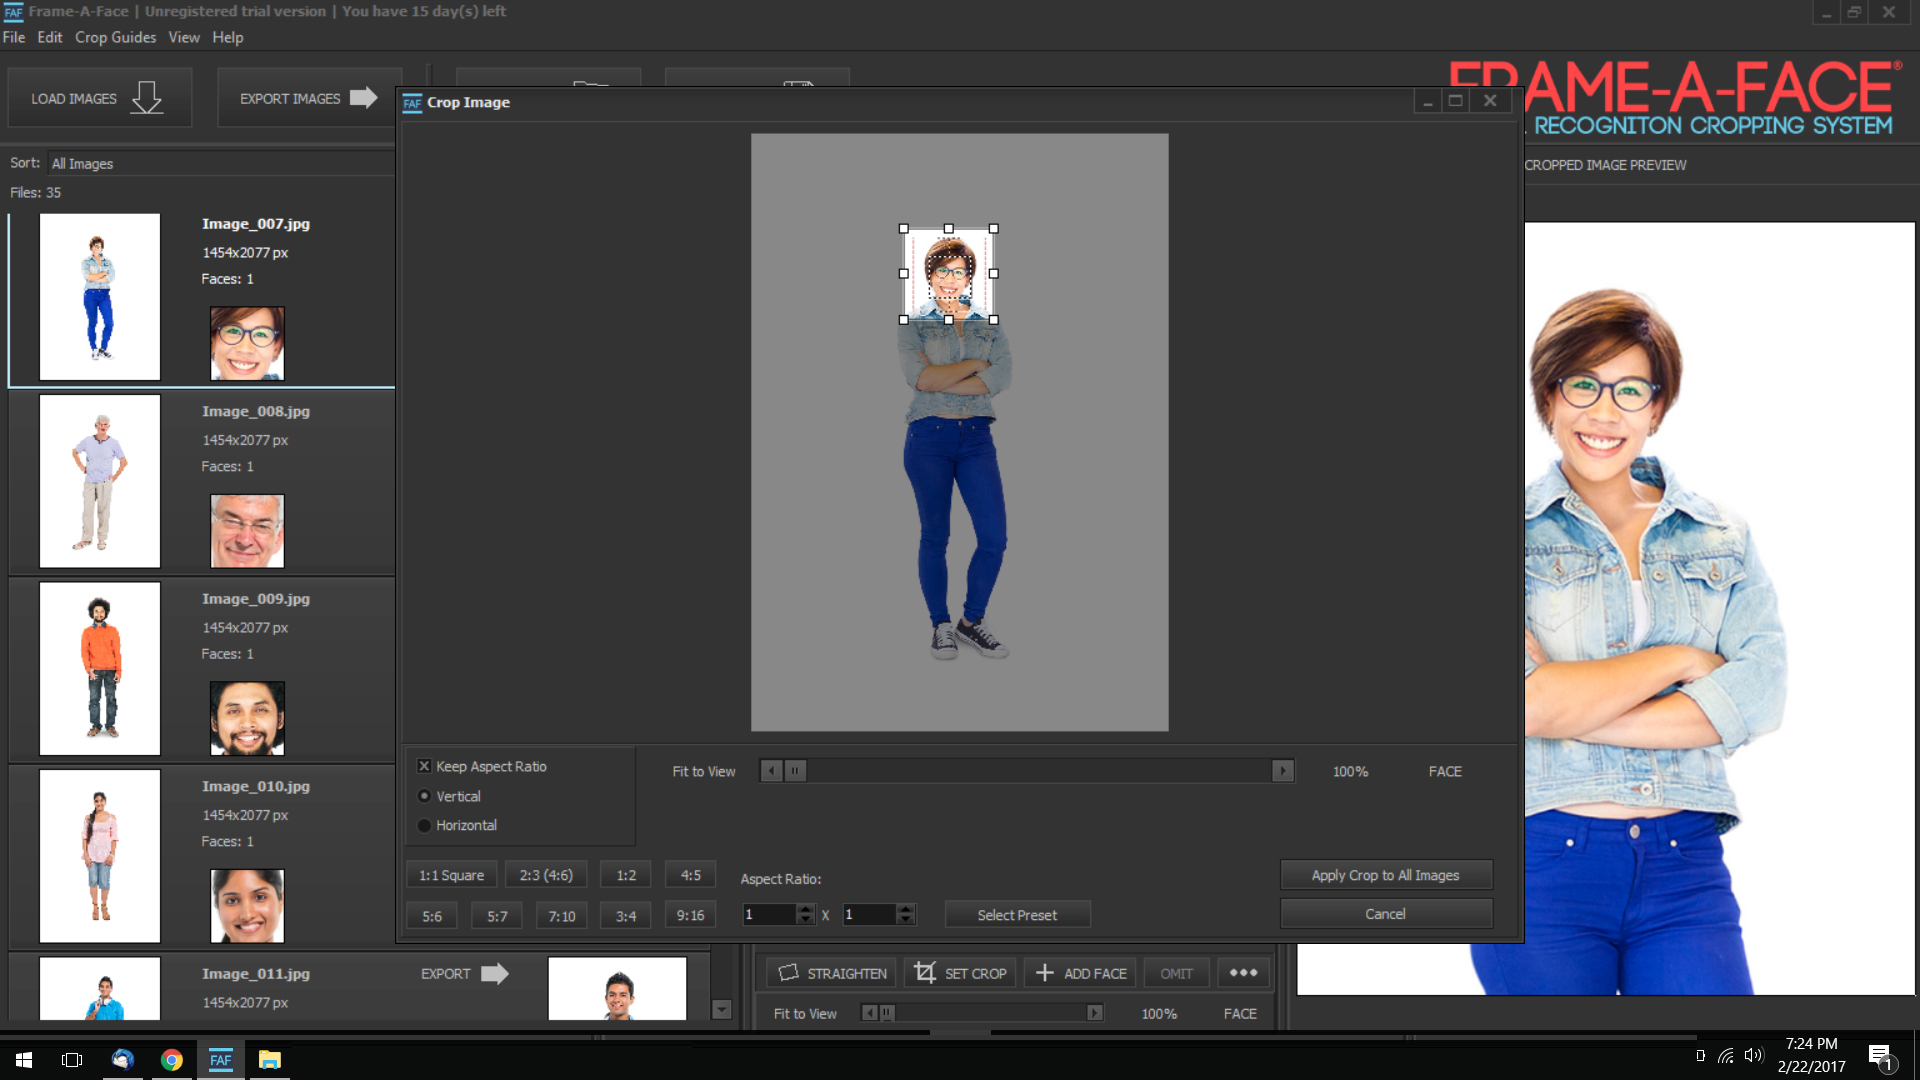
6. Choose an image from the image tiles that is most representative of the batch. For example, one that is centered with good headroom. Click the “Set Crop” button in the original image preview pane.
7. This will be the master crop for the batch. Set the dimensions and use the controls to draw the crop box.
8. Click the “Apply Crop to All Images” button.
9. Scroll through your batch to make sure that the crop has been applied correctly. You make make individual adjustments in the original image preview panel. Adjustments made here will only apply to the selected image (will not apply to batch). The words “CUSTOM CROP” denote that an image has been individually modified.
10. When your batch is ready, click on the “Export Images” button. You will be asked where to save the images and Frame-A-Face will export your images with the crop applied.
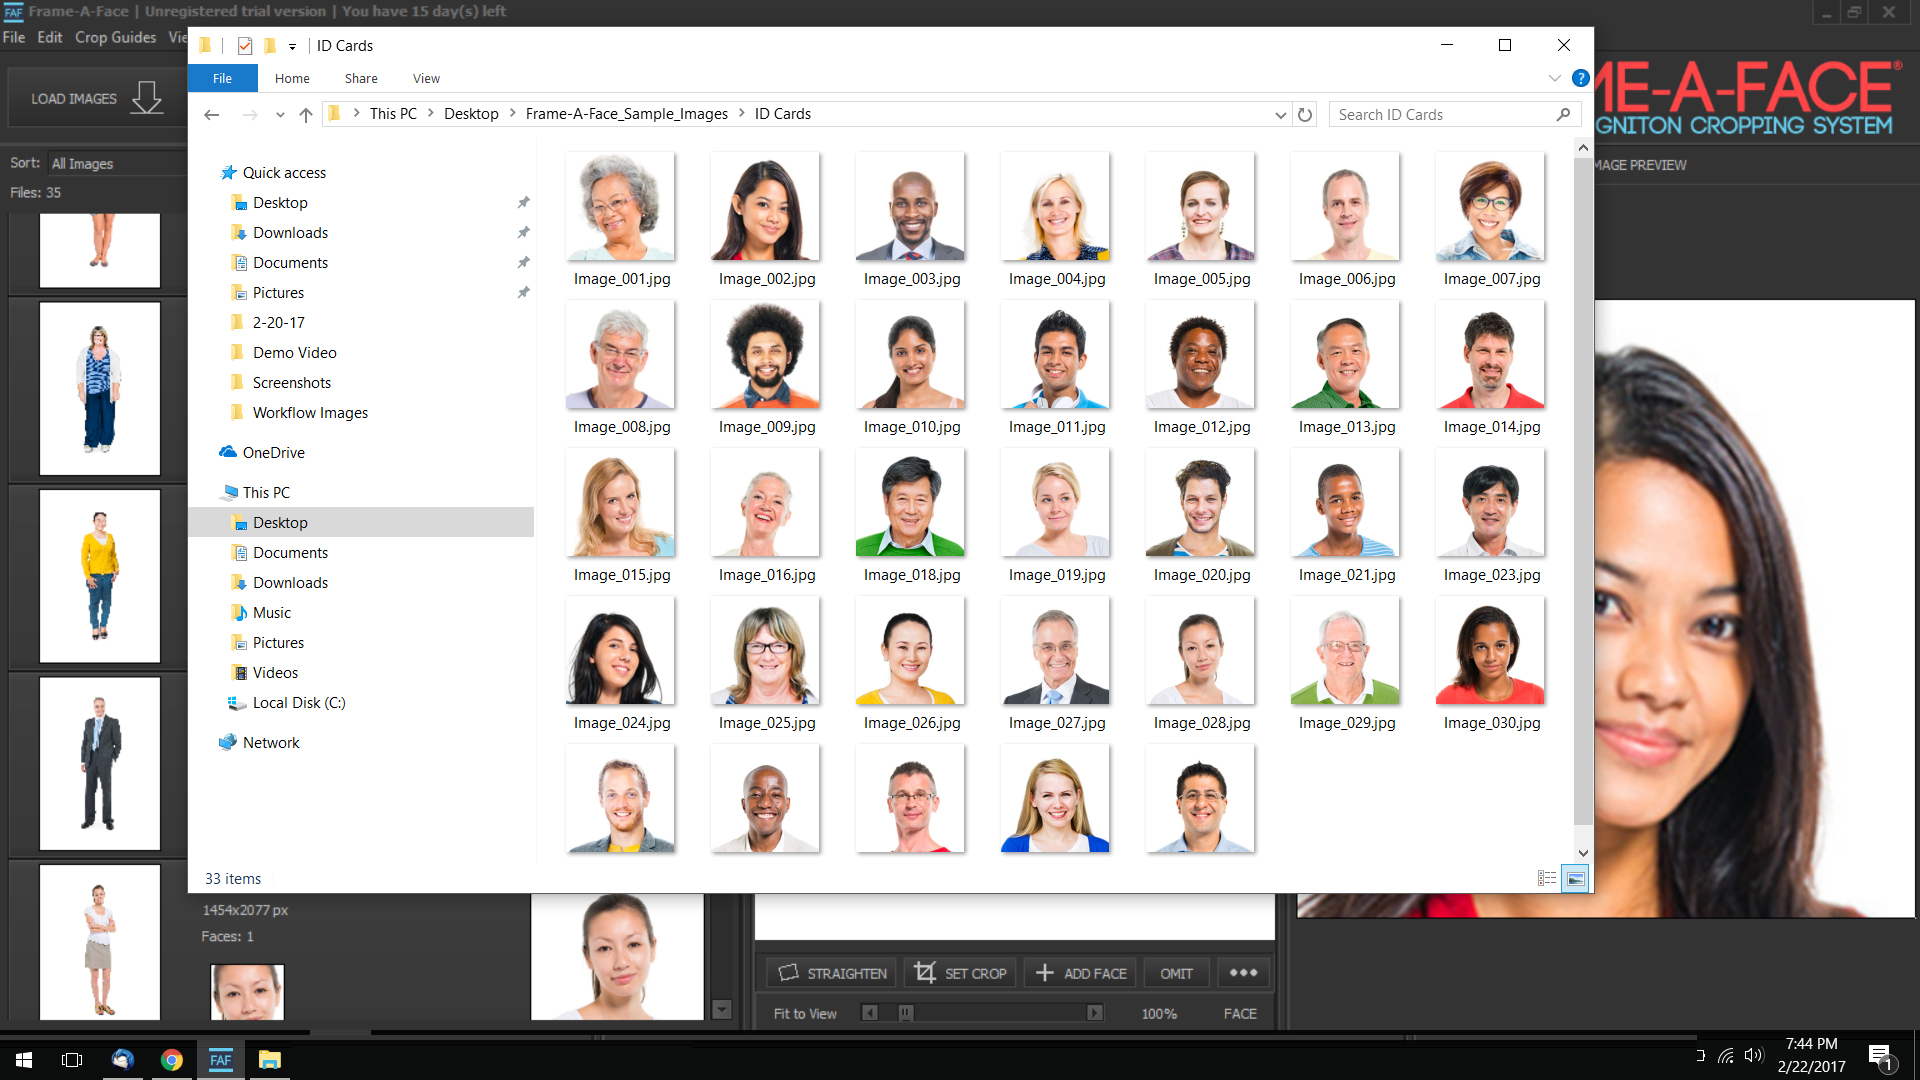
TIP: Frame-A-Face can quickly convert your batch to a new crop. After exporting your batch of cropped images, return to the original image you used for the master crop. Select the “Set Crop” button and now change the dimensions (for example 1:1 for ID cards) and redraw the crop box. Click “Apply Crop to All Images.” Frame-A-Face will convert all images to the new crop. You are now ready to export the entire batch, this time, for ID Cards.
Below, you will find videos and screen shots of the easy-to-use interface
as well as direct worflow application of the software.

After Frame-A-Face launches, click on the “Load Images” button. Browse to the folder with your batch of images and be sure to select all, using "Ctrl" key + "a" key.

Choose an image from the image tiles that is most representative of the batch. For example, one that is centered with good headroom. Click the “Set Crop” button in the original image preview pane. This will be the master crop for the batch. Set the dimensions and use the controls to draw the crop box. Click the “Apply Crop to All Images” button.

Scroll through your batch to make sure that the crop has been applied correctly. You can make individual adjustments in the preview panel. Adjustments made here will only apply to the selected image (will not apply to batch). When your batch is ready, click on the “Export Images” button. You will be asked where to save the images and Frame-A-Face will export your images with the crop applied.

Frame-A-Face can quickly convert your batch to a new crop. After exporting your first batch of cropped images, select an image as your next master crop. Select the “Set Crop” button and now change the dimensions (for example 1:1 for ID cards) and redraw the crop box around the face. Click “Apply Crop to All Images.”

Scroll through the image tiles and review the new head and shoulders crop for ID cards. Make adjustments as needed. When you are satisified with the crop placment, click on the "Export Images" button. This time, Frame-A-Face will save the entire batch of images cropped for ID cards.

Your images are now ready! In a matter of minutes, we created two folders, each with a different set of cropped images.
One set is ready to send to the printer to fulfill customer orders and the second set can be used to batch fill
ID cards.
Congratulations! By implementing Frame-A-Face into your workflow you just saved yourself time and money.
Frame-A-Face Overview Video
Frame-A-Face is used by companies around to accelerate their workflow, cropping hundreds of images for
website directories, school yearbooks, passport, id photos and more.
Frame-A-Face Advanced Features
This video explains the new features that were added to Frame-A-Face. From a faster
rendering engine, to crop presents and export templates, all were designed to
speed up your imaging workflow.
For a limited time, purchase the Frame-A-Face cropping system for only $229.00 This software will revolutionize your digital portrait workflow, saving time and money. Not convinced? Try the full version of Frame-A-Face free for 15 days.